Hola!
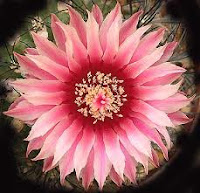
Para festejar nuestro mes patrio va éste pequeño granny inspirado en las flores de los cactus y los colores de la bandera de México...
Hi!
To celebrate our month patriotic, this little granny is inspired by cactus flowers and colors of the flag of México...
EDITO: debido a que en muchos comentarios me han dicho que éste parece un granny navideño (cosa que me hace mucha gracia por lo involuntario de la situación, jijiji, agrego otra muestra para que se aprecie que mi inspiración fué la flor de un cactus y no una nochebuena :)...
EDIT: because in many commentaries, have said to me it looks like a granny Christmas (which I think is funny for the involuntary situation, jijiji, I add another example, to emphasize that my inspiration was the flower of a cactus, not a poinsettia :)...
Instrucciones:
Instructions:
1.-Iniciar con un aro mágico y tejer 10 puntos bajos en amarillo, cambiar a color blanco y tejer todos aumentos en punto enano para un total de 20 puntos, rematar y cortar...
2.-En rojo,hacer una lazada sobre el tejido en blanco y subir con dos cadenas...
3.-Tejer 1 punto enano sobre cada punto en blanco y después una lazada...
4.-Repetir hasta terminar con un total de 20 puntos enanos y 10 lazadas (total 30 puntos)...
1.- Start with a magic loop and work 10 single crochet in yellow, changing to white and work all increases for a total of 20 stitches, finishing and cutting ...
2.-In red, make a loop over the white stitches and up to two chains ...
3.-Work 1 half-double crochet on each white stitch and then a loop ...
4.-Repeat ending with a total of 20 stitches and 10 loops (total 30 stitches)...
2.-In red, make a loop over the white stitches and up to two chains ...
3.-Work 1 half-double crochet on each white stitch and then a loop ...
4.-Repeat ending with a total of 20 stitches and 10 loops (total 30 stitches)...
5.-Sobre la lazada, subir con 4 cadenas, sin cerrar, tejer 2 puntos altos juntos en los siguientes 2 puntos, para un total de 5 puntos (ver foto)...
6.-Cerrarlos juntos y subir con tres cadenas...
7.-Cerrar las cadenas en la base formando un picot, tejer 3 cadenas más...
8.-Terminar el pétalo tejiendo un punto bajo en el 2° punto enano de la vuelta anterior (antes de la lazada)...
5.-On the loop, up to 4 chains, not closed, work 2 double crochet together in the next 2 points, for a total of 5 points (see photo) ...
6.-Close them together and come up with three chains ...
7.-Close the chains at the base form a picot, work 3 chain more ...
8.-Finish the petal weave a single crochet in the 2° half-double crochet stitch earlier (before the loop) ...
6.-Close them together and come up with three chains ...
7.-Close the chains at the base form a picot, work 3 chain more ...
8.-Finish the petal weave a single crochet in the 2° half-double crochet stitch earlier (before the loop) ...
9.-Repetimos hasta terminar lo 10 pétalos, rematamos el hilo...
10.-En color verde, iniciar con un lazada entre dos pétalos, subir 7 cadenas y regresarse sobre la misma con 1 punto bajo-2 puntos enanos-2 puntos altos dobles y 2 puntos altos triples...
11.-Repetir hasta terminar las 10 hojas...
12.-Por detrás se observa cómo van ensartadas las lazadas y los puntos de las hojas...
9.-Repeat until the end of the 10 petals, finish off the thread ...
10.-Now in green, start with a loop between two petals, and work 7 chains and back with 1 single crochet-2 half-double crochet-2 doubles crochet and 2 triple crochet ...
11.-Repeat until finish 10 leaves ...
12.-Behind seen how they strung the loops and the stitches of the leaves ...
10.-Now in green, start with a loop between two petals, and work 7 chains and back with 1 single crochet-2 half-double crochet-2 doubles crochet and 2 triple crochet ...
11.-Repeat until finish 10 leaves ...
12.-Behind seen how they strung the loops and the stitches of the leaves ...
13.-Formar un cuadrado con 7 cadenas por lado (cada 2 hojas y media)...
14.-Tejer 9 puntos altos por lado y 2 cadenas en las esquinas hasta cerrar, partir de aquí empezamos a formar el granny tradicional que nos servirá de base hasta tener el tamaño deseado...
15.-Rematamos la orilla con puntos bajos en rojo...
16.-Y taraaaán! Terminamos nuestro granny square!...
13.-Form a square with 7 chains for side (each 2 and a half leaves) ...
14.-Work 9 double crochet stiches and 2 chains in the corners to close, from here we begin to form the traditional granny will serve as a base, weave to have the desired size ...
15.-Topped the edge with single crochet in red ...
16.-And taraaaán! We finished our granny square! ...
14.-Work 9 double crochet stiches and 2 chains in the corners to close, from here we begin to form the traditional granny will serve as a base, weave to have the desired size ...
15.-Topped the edge with single crochet in red ...
16.-And taraaaán! We finished our granny square! ...
Gráfico orientativo:
Chart:
Espero que disfruten el trabajo y nos vemos pronto :)!
I hope you enjoy the work, and see you soon :)!


